Add and Make to a Blanket Shawl and More
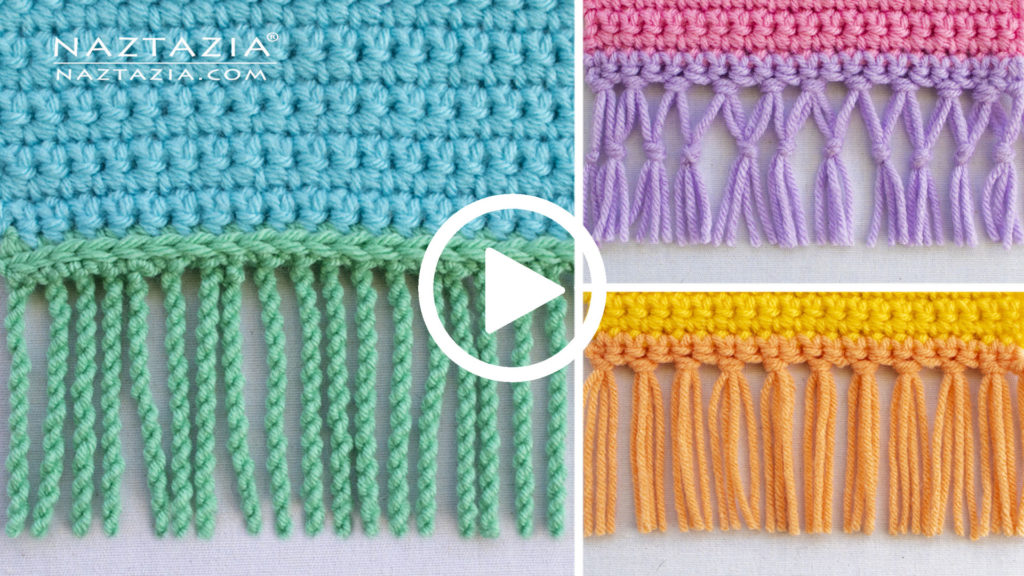
You can make and add fringe to a blanket, scarf, and shawl. This tutorial shows the twisted, knotted, and double knotted fringe. I’m a big fan of adding edgings like this to so many handmade items!
All of these types of fringe work nicely on both crochet and knitted items. In the tutorial video I show three types of fringe edgings and borders you can make.
First Fringe – Twisted Fringe
The first is called twisted fringe. One nice thing about a twisted edging like this is that it doesn’t fray since no yarn strand ends hang out. You will first make a slip stitch into the first stitch. Then you will stretch the yarn loop out any number of inches (or centimeters). I like using a nine-inch tissue box for doing this. Next, rotate your hook to twist and coil the yarn. This process creates a nice tightly wound piece that curls in on itself. And voila! Twisted fringe.
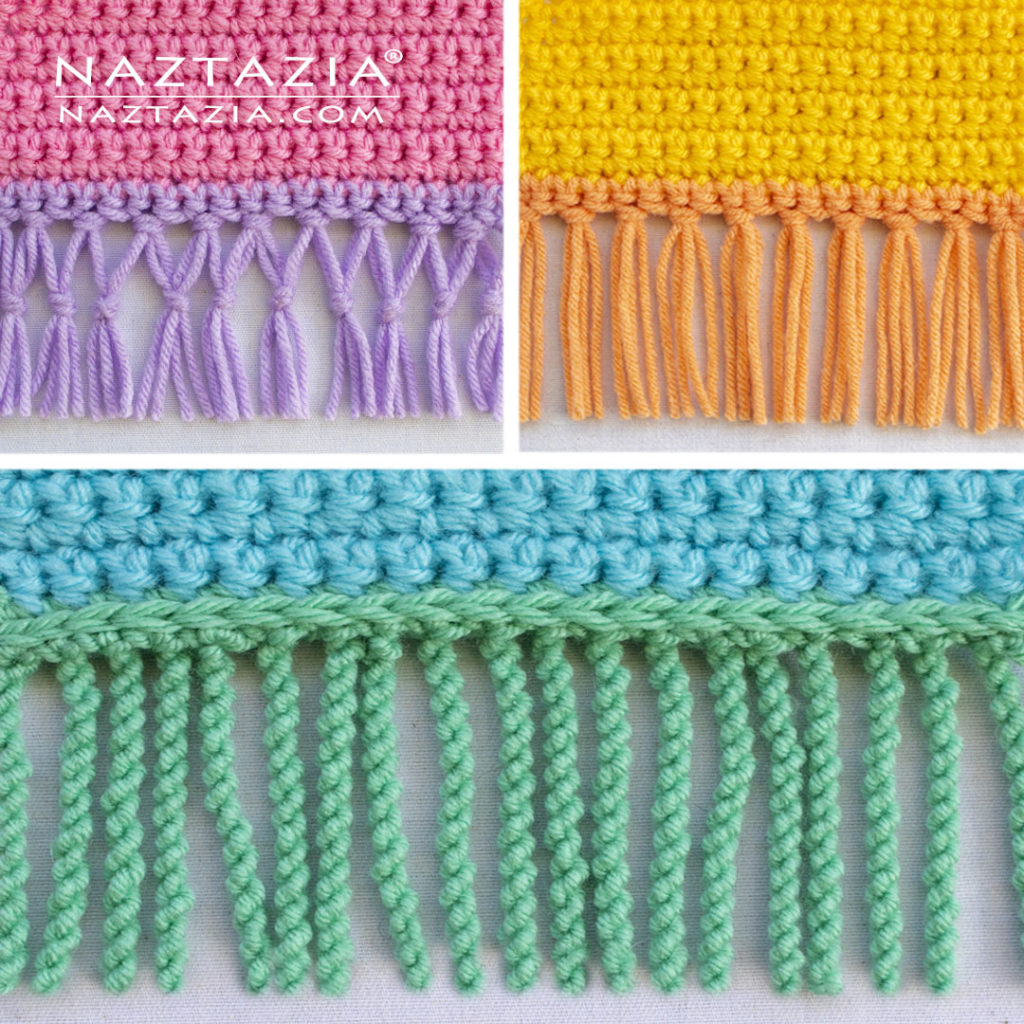
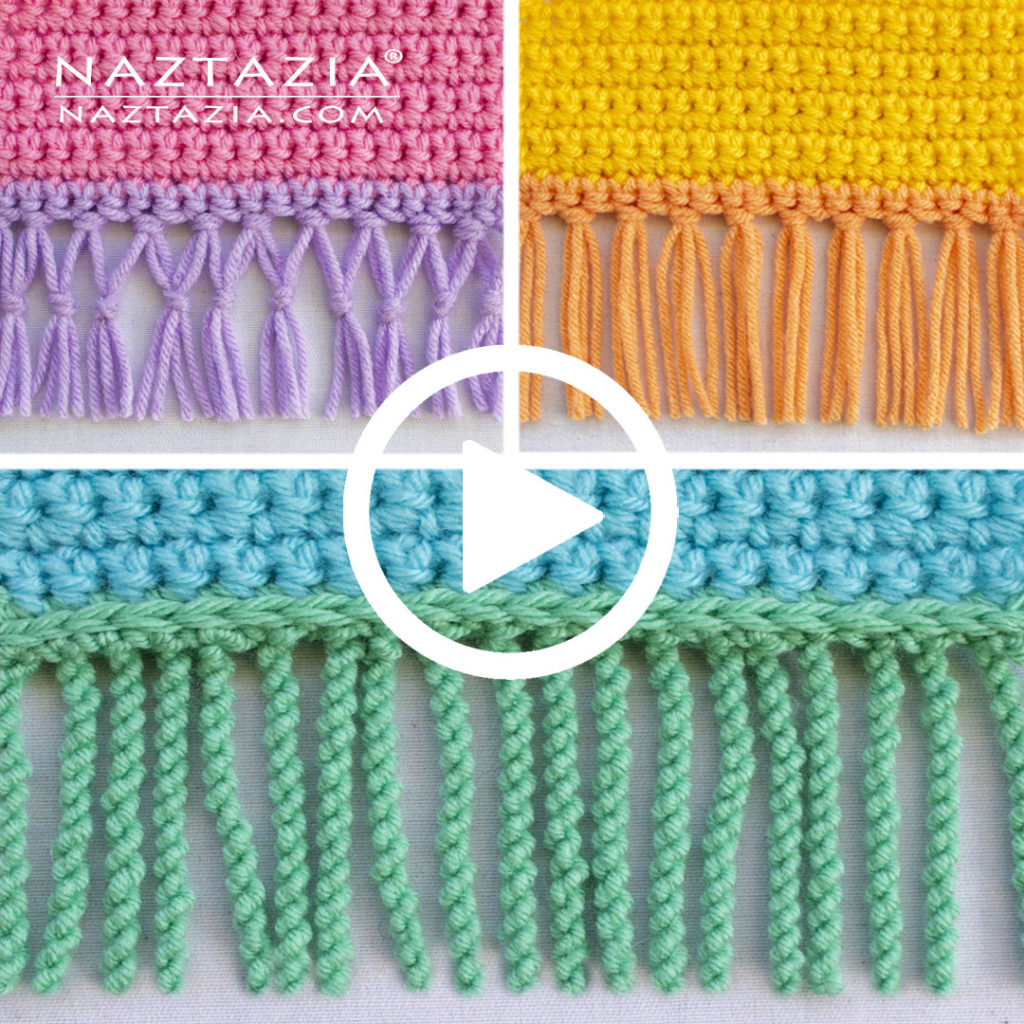
Second Fringe – Knotted Fringe
The second is called knotted fringe. This type of fringe is probably the most popular and what you find on most items. First, you will create consistent strands of yarn by wrapping them around something sturdy like a piece of cardboard or notepad. Then you’ll cut them. The height of the pad or cardboard determines the size of each. Granted, it will be ever so slightly less tall since you’ll probably want to trim the ends of the fringe.
I like to use two strands of yarn held together. However, feel free to use one strand, three strands, or 50 strands held together simultaneously. If you hold together 50 strands, I’d especially like to see a picture of that! You can email me here. You’ll fold the two strands in half, then insert your crochet hook into a stitch. Pull the loop from the strands partially through. Then push the yarn ends through the loop and tighten the knot.
In the end, you can use a rule or envelop or some other guide along with scissors to neatly trim the bottom of the fringe. However, if you have a rotary cutter, straight edge, and cutting mat, you can use them to cut the yarn as well. This method makes especially straight fringe.
Third Fringe – Double-Knotted Fringe
And finally, the third type is double-knotted fringe. You’ll begin this method the same way as the regular knotted fringe. Then you’ll stagger the knots by selecting only the first two strands first, then every four strands after that. You’ll also make these about a half-inch to an inch downwards.
I like to keep my second layer of knots very loose until I complete all the knots. By waiting until the end, I tighten the knots all at once in a more consistent manner.
And that’s it. That’s how I make and attach three attractive fringe edgings to my work. By the way, if you like more borders and edgings, check out all of my other videos and patterns HERE.
Facebook Video
Click the play button to watch the video below. And if you like this, be sure to follow my Facebook page to get notified of new videos!
YouTube Video
Click the play button to watch the video below. And if you like this, be sure to subscribe to my YouTube channel to get notified of new videos!