How to Crochet a Candy Cane
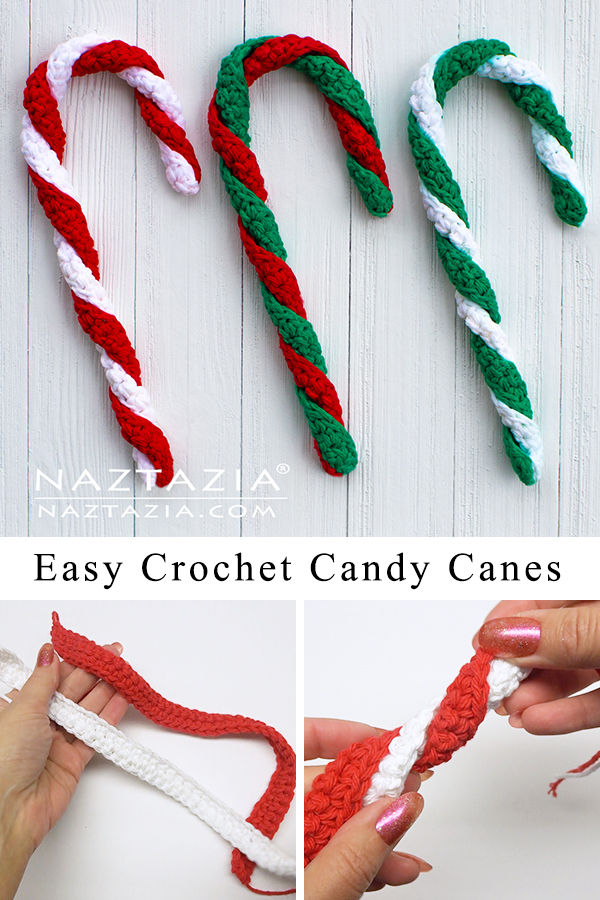
Here’s a quick and very easy candy cane to crochet. With just 2 rows of single crochet stitches, this crochet pattern is perfect for a beginner. A glue and water mixture then help stiffen the candy canes keep their shape. Once completed they are about 8 inches tall and 3 inches wide.
I’m using Sugar n Cream for this crochet pattern, which is a 100% cotton yarn, in the colors White, Red, and Mod Green. The cotton yarn absorbs the glue and water mixture nicely, so the candy cane is very solid once completed.
It is important to really saturate the crocheted ribbon strips with the glue and water mixture. Once that is done, you can shape the cane and lay it on a plastic wrap surface. Use the long tail ends to easily move the candy cane into shape without squishing the main part of it. Mine usually dry in a day or two.
The length of drying time is dependent upon the temperature and humidity level. Higher temperatures generally dry the glue faster. Lower humidity levels also help with the drying process. I like to put my crochet work underneath our forced air heating unit, as you can see in the video. It makes them dry rather quickly!
Be sure to pin the following image to your Pinterest board! Then continue reading below.
Here’s a nice image (or two) to pin on your Pinterest boards.

Please note I may receive compensation from the links below.
Ravelry queue for Easy Candy Cane
[embedyt] https://www.youtube.com/embed?listType=playlist&list=PL-Wznh_zZEy9VhQf21UF8UMnvqyhKHPUf&v=GTv2zrxpqis[/embedyt]


