Diamond Painting Tutorial
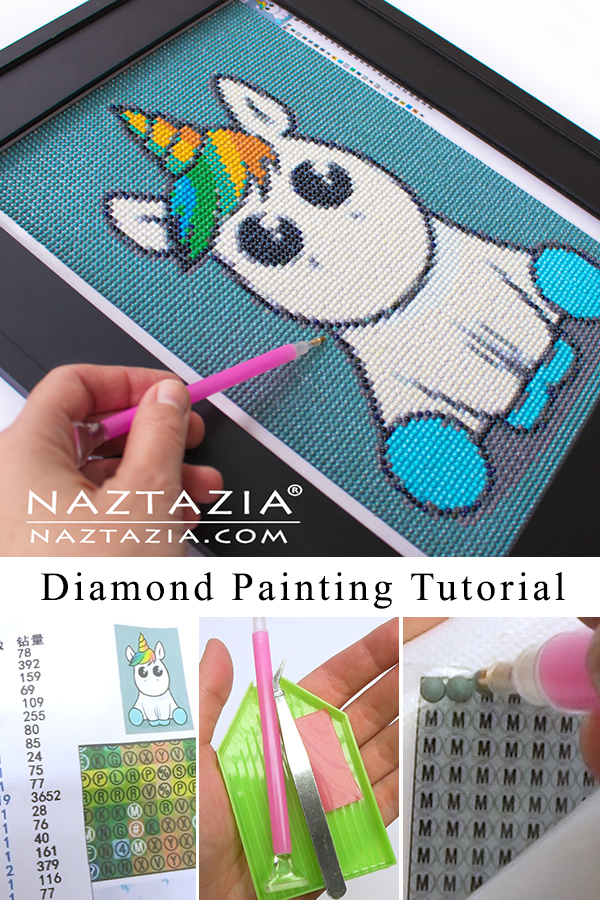
Have you tried diamond painting yet? It’s a fun craft that is great for all ages. Check out my daughter Sarah’s tutorial on how to use your kit!
When working with this type of craft, the first thing you need is a kit. They have them online and in stores. Sometimes you can get a custom one made with your own photo.
As with all crafts, you’ll need some tools that most likely will come with the kit. These include the paint-by-numbers canvas, the colorful diamond dots, a gem picker upper tool, a block of tacky wax, a tray, and tweezers.
The canvas itself has a sticky coating on it with printed circles. Because of this tacky glue-like background, the jewels stick to it very easily. We haven’t had one fall off yet! The tool requires you to grab a piece of the tacky wax first. Then you use this tool to lift the little gems from the tray and place them onto the sticky canvas.
Once completed, we like to place our work in a frame. You can remove the glass and just use the frame part, or you can really protect your work by leaving the glass in the frame. Either way the finished work looks really nice!
One thing we didn’t mention in the video because it is NOT in the kit’s instructions is how we chose to preserve the finished work. I wasn’t sure if the kids (well, the little one at least) or dogs would get tempted to pick off the gems. I sprayed a very fine mist of Krylon clear gloss (from a spray can) over it. I can’t guarantee that will work on – or damage – the other kits out there. But it took away the remaining stickiness in between the gems and really solidified them forever on the canvas.
Be sure to pin the following image to your Pinterest board! Then continue reading below.
Here’s a nice image (or two) to pin on your Pinterest boards.

Please note I may receive compensation from the links below.
Click the play button to watch the video below. And if you like this, be sure to subscribe to Sarah’s channel to get notified of new videos!
[embedyt] https://www.youtube.com/embed?listType=playlist&list=PLU115-fe8aT2mWSzDQoW04mF7WfLFl59I&v=tTZR7aYOga8[/embedyt]


