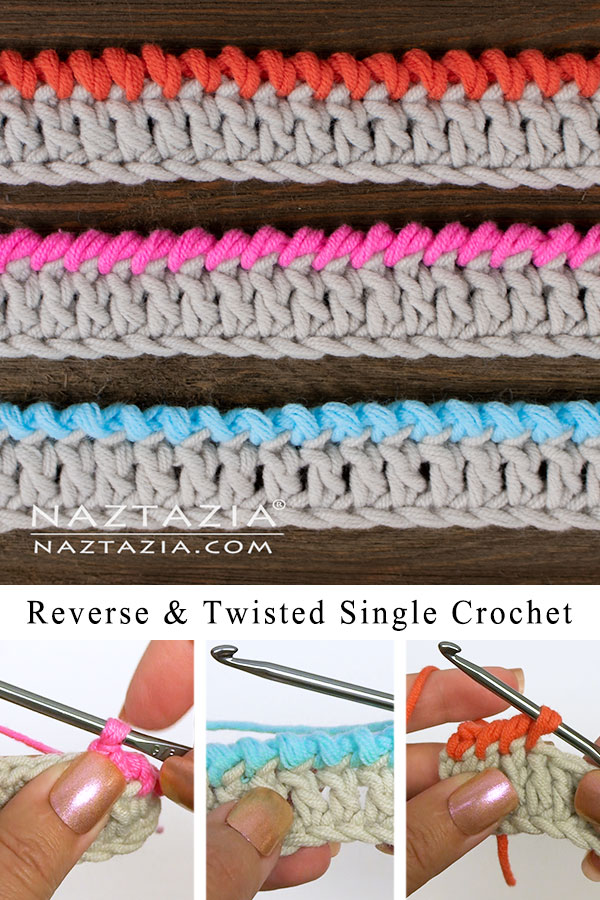
How to Crochet Reverse Single Crochet (crab stitch), Twisted Single Crochet, and Reverse Slip Stitch Edging
The reverse single crochet edging is a smaller border for your crochet work. Also check out the twisted single crochet and backwards slip stitch.
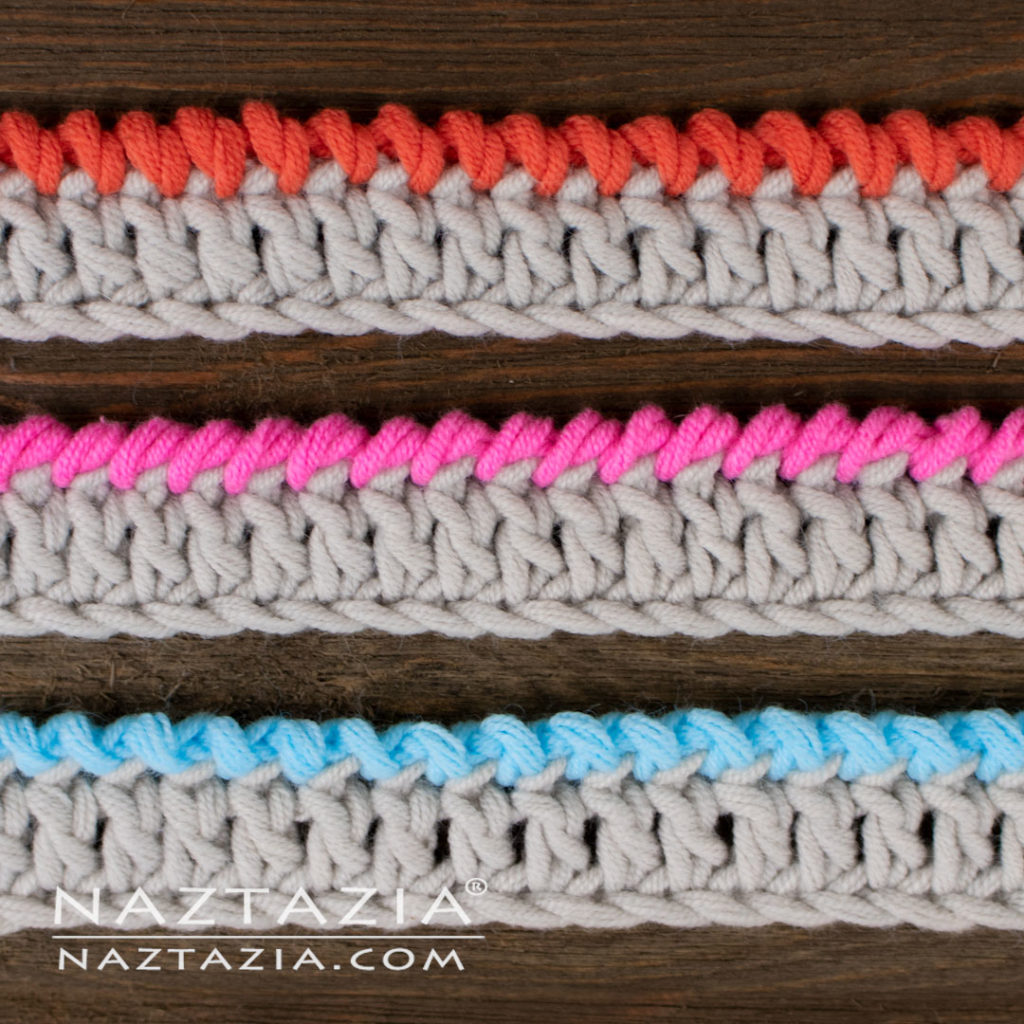
Reverse Single Crochet
The reverse single crochet is also known as the crab stitch. It produces a lovely smaller edging or border. To do this, you will begin on the opposite end of the crochet work that you want the border. You’ll make a stitch in the first stitch, which looks like it should be the last stitch.
And then you will proceed to make these crochet stitches, but working in the opposite direction. This can be a little tricky at first, but once you try a few stitches, you’ll see it is very easy.
As you can see from the sample, this particular border edging produces a neat effect. You can use the same color yarn as your main project. Or like I did in the samples, I used a contrasting color yarn.
Twisted Single Crochet
The twisted stitch is made in almost the same way as a regular one. However there is a twist to it, quite literally. After drawing up a loop, you’ll twist your crochet hook before you yarn over and draw through the loops. This takes a bit of practice, but after a few stitches you’ll find it’s quite simple to do.
Also, I can guarantee it will capture the attention of anyone around you. Most people are probably used to seeing you crochet the regular way. When you start spinning and twisting your hook around like a majorette’s baton, or a rock band’s drummer, they will definitely wonder what you are doing!
Reverse Slip Stitch
You will make the reverse slip stitch in almost the same way as the reverse stitch. This one will have you start at the opposite end of where you will normally work your crochet stitches. You’ll make slip stitches with chain 1s in between. This produces a really neat looking edging.
Be sure to pin the following image to your Pinterest board! Then continue reading below.
Here’s a nice image (or two) to pin on your Pinterest boards.
Written PDF Pattern
First, click on the below link. The pattern is a PDF. You will need a program that can read PDFs like Adobe Acrobat. Many web browsers can also access PDFs. However if you have any issues accessing the file, try another web browser, or Adobe Acrobat.
Reverse Single Crochet and More Pattern
Did you make this pattern or use this technique? Tag me on Instagram at @naztazia or Facebook at @naztazia or YouTube @naztazia or Tiktok at @naztazia. You can also use the tag #naztazia on those and other social media sites.
YouTube Video
Click the play button to watch the video below. And if you like this, be sure to subscribe to my YouTube channel to get notified of new videos!
[embedyt] https://www.youtube.com/embed?listType=playlist&list=PL-Wznh_zZEy9VhQf21UF8UMnvqyhKHPUf&v=YeMilovA1ks[/embedyt]Nail polish used includes Sally Hansen Matte 017 in Rose Flush. Top coat is Revlon 745 Pink Glaze.